Back to Proposal Tool Help PageHow do I create a Load Calculation?
Sign in to your LennoxPROs.com account and navigate to the Load Calculator in the Sales Tools menu.

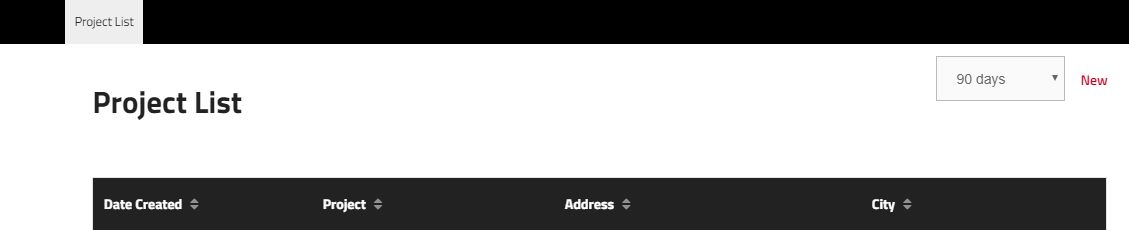
From the project list, click on ‘New’ to create a new project.
You will be prompted to enter information about your project. Proceed to enter the Project Name and the information about the home. Click the drop down arrow under load calculation and select ‘Room by room’.

The code year will be entered as either the year the home was built or the year it was last updated. Save your project to move on to the next step.
Construction Features
Your construction features will be automatically populated based on the information about the home given in the first step. From here, you can begin updating or filling in features that were missed to get your calculation to be as specific as possible. The features that you can alter are above grade walls, below grade walls, ceilings, doors, floors, skylights, and windows. After each feature, click ‘continue’ to move to the next construction until you reach the review page.
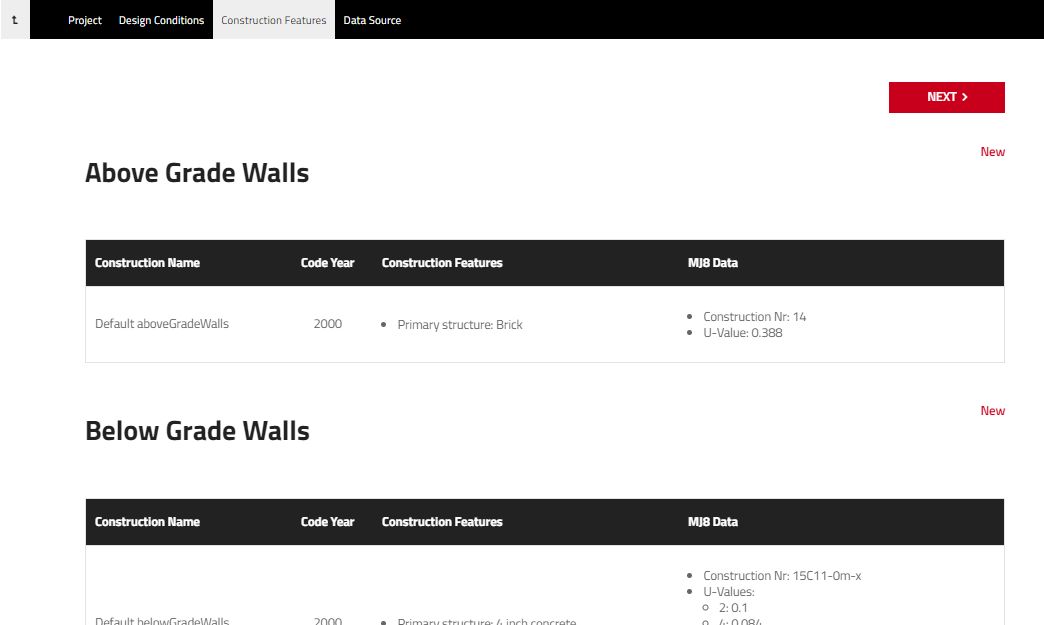
Once you reviewed your construction features, click next to move to the data source entry.
Enter the Dimensions of the Home
You will be asked how you want to enter your dimensions and you can choose either map trace or by text. Select Text.

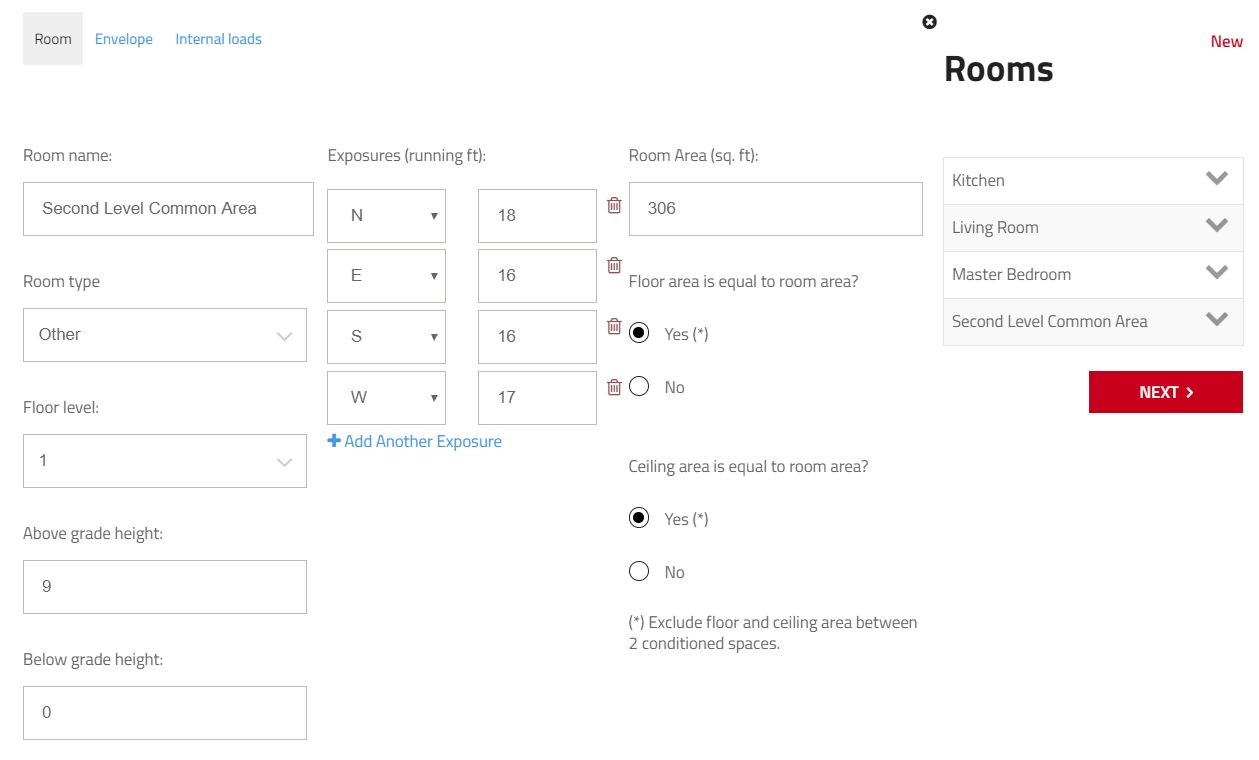
Enter the information for the room you want to trace. Under exposures, label the directions that the exterior walls face from the home and the running feet that the wall is exposed. The room area is automatically calculated but you can adjust this number if it’s not correct. Verify that the floor and ceiling area is equal to the room area. If not, enter the correct area.
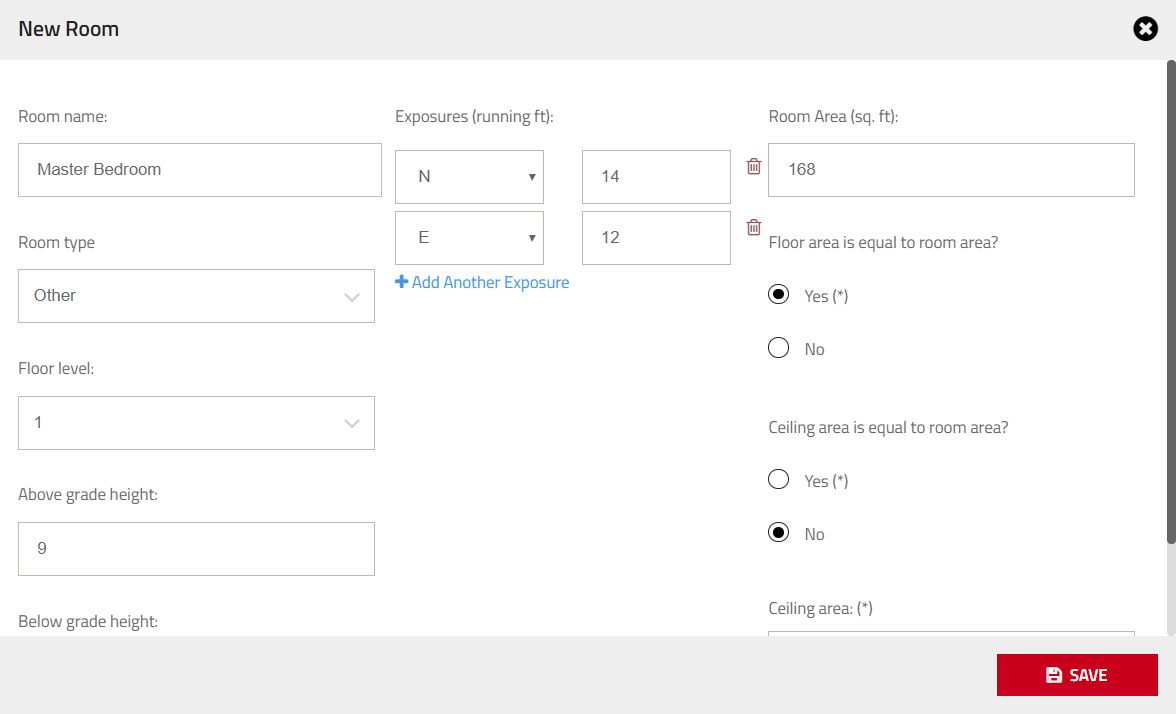
Continue to add new rooms until you have covered the total area of the home being surveyed. Simply click on ‘new’ and continue the manual entry steps each time.

Review all of your room entries by clicking on each room and making any necessary adjustments. You also have the option to modify the construction features or internal loads of each room by clicking on the envelope or internal loads tabs, respectively. Once all rooms are configured correctly, click next to move to the next step.
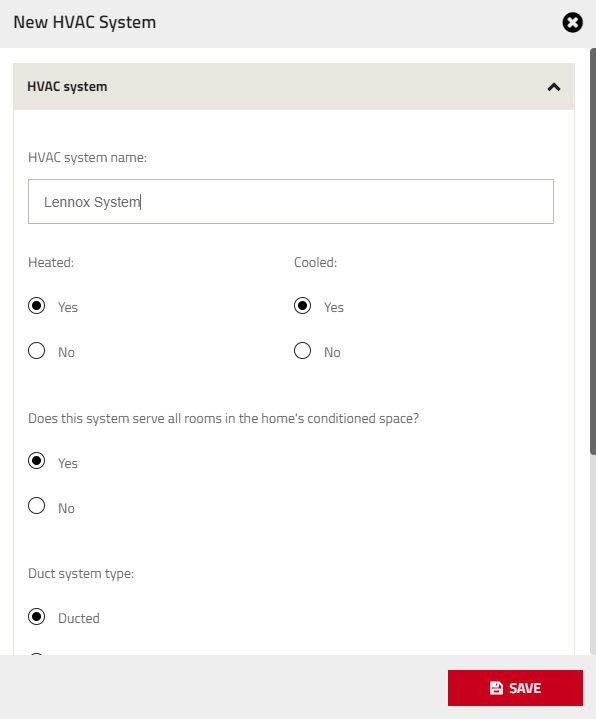
Name your System
Name your HVAC system and survey the features of the home below. For your new HVAC system, you will be able to answer survey results of the engineered ventilation, blower motor, infiltration, and winter humidification. Click save.
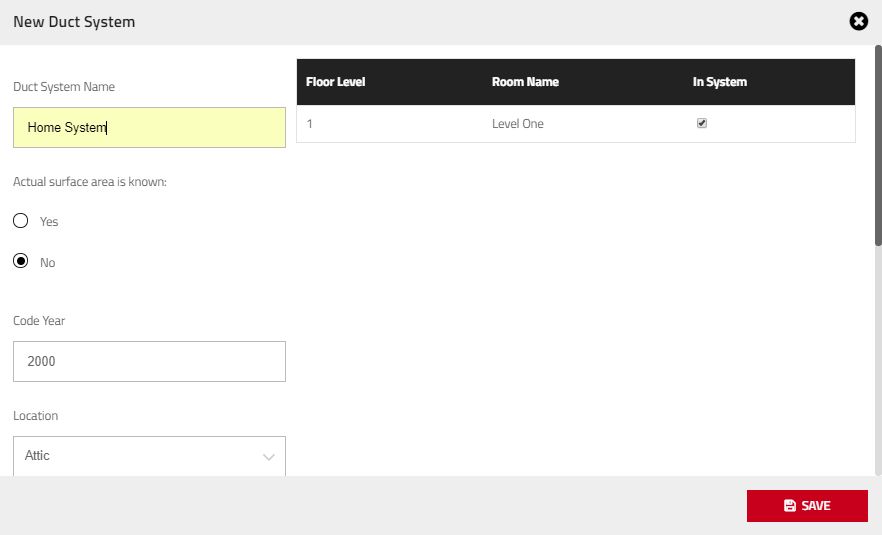
Name your duct system and enter the specs of the system. You can also label which floors are included in the system and save. You will see your first look at your load calculation with all of the necessary information.
Continue to configure your report by moving over to the ‘Hot Water Piping’ tab or the ‘Internal Loads’ and you can insert data to further modify your calculation.
Download your Report
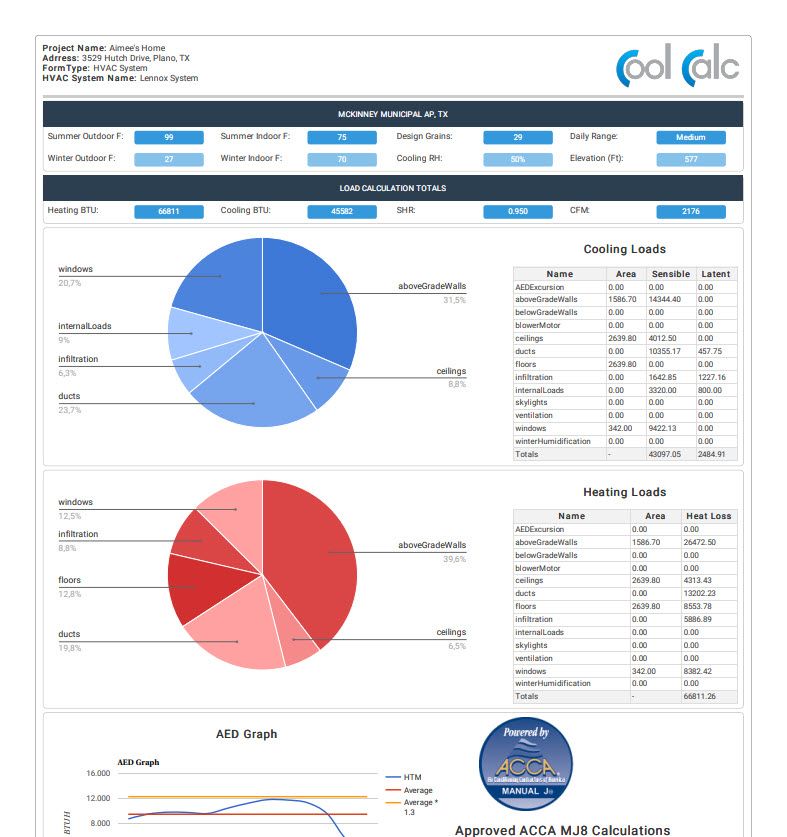
View the MJ8 Report Tab for the option to save and download your final report. Save as a “preliminary” status if additional edits will be made or “Final” to lock all data. You can generate a report for the whole HVAC System or for each room when you have selected the Room-By-Room option.
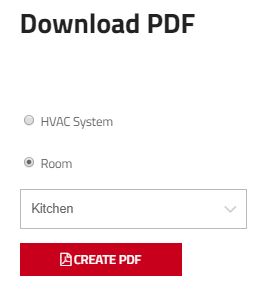
After downloading the calculation, you can open, save, and print the PDF file.